ブラウザから、GPIOを操作する方法を解説しています。
RaspberryPi上にWebサーバを構築して、Web経由でサーバにアクセスすることで、GPIOを操作することが可能になります。これにより、ブラウザからLEDを点灯したりすることができます。
GPIOとLEDの接続は、GPIOでLEDの点滅と同じものとします。
Webサーバのインストール(lighttpd)
Raspberry PiにWebブラウザをインストールします。
軽量で高速だということで、WebサーバとしてApacheではなく、lighttpdをインストールします。
以下のコマンドを実施するだけでインストール完了です。
$sudo apt-get install lighttpd
インストール完了すると、Webサーバが自動で起動します。
Raspberry PiのIPを調べるには、以下のコマンドを実行します。
$ ifconfig
Webブラウザで、IPアドレスを指定して、ページが表示できるかを確かめることができます。
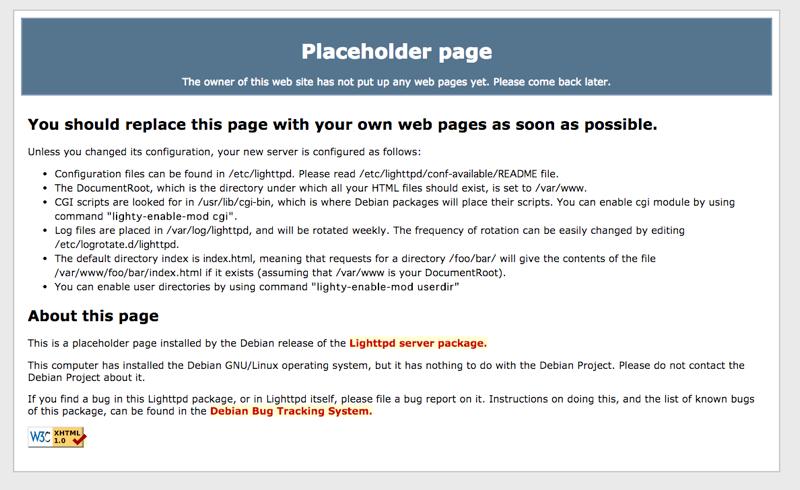
うまくインストールできていれば、以下のページが表示されます。
Webサーバ(lighttpd)の設定
まずは、lighttpdでPythonが実行できるように確認します。Pythonを動かすために、FastCGIというものを使用します。lighttpdサーバで、FastCGI使うにはライブラリがいるようなので、以下のコマンドでインストール。
$ sudo apt-get --no-install-recommends install python-flup
参考にしたサイトに、/usr/bin/pythonのパスをそのまま使うとセキュリティ的によくないよ的なことが書かれている気がするので、以下の手順でパスを変更します。
pi@raspberrypi /var/www $ ls -l /usr/bin/python
lrwxrwxrwx 1 root root 9 Jun 6 2012 /usr/bin/python -> python2.7
pi@raspberrypi /var/www $ sudo cp /usr/bin/python2.7 /usr/bin/pythonCGI
pi@raspberrypi /var/www $ sudo chmod u+s /usr/bin/pythonCGI
pi@raspberrypi /var/www $ ls -l /usr/bin/pythonCGI
-rwsr-xr-x 1 root root 2674528 Mar 17 18:16 /usr/bin/pythonCGI
次にlighttpdの設定を行います。
設定ファイルである/etc/lighttpd/lighttpd.confを編集します。
- server.modules = ()のカッコ内に”mod_fastcgi”,を追加。
- ファイルの最後に以下を追加。
fastcgi.server = (
    "test.py" => (
        "python-fcgi" => (
        "socket" => "/tmp/test.python.socket",
        "bin-path" => "/var/www/test.py",
        "check-local" => "disable",
        "max-procs" => 1)
    )
)
設定ファイルを書き変えたらlighttpdサーバを再起動します。
$ sudo service lighttpd restart
ここまでで、設定は完了です。
次に実行するテストプログラム(/var/www/test.py)を作成します。
以下のプログラムは、ブラウザでアクセスした時に、Hello World!を表示するだけのものです。
#!/usr/bin/pythonCGI
def myapp(environ, start_response):
    start_response('200 OK', [('Content-Type', 'text/plain')])
    return ['Hello World!\n']

if __name__ == '__main__':
    from flup.server.fcgi import WSGIServer
    WSGIServer(myapp).run()
ファイルのアクセス権は実行可能にしておきます。
$ chmod +x test.py
最後にブラウザで対象のPythonプログラムにアクセスして確認します。
Webブラウザでアドレスを設定します。
http://[RaspberryPiのIPアドレス]/test.py
画面に「Hello World!」だけが表示されたらテスト完了です。
ここまででRaspberry Pi(lighttpd)にアクセスして、Pythonを動作させることまでできました。
次は、Webブラウザから、Raspberry Pi(lighttpd)を経由してLEDを点灯・消灯するために、lighttpdの設定を追加します。
先ほど編集した/etc/lighttpd/lighttpd.confをもう一度編集します。
ファイルの最後に以下を追加。
fastcgi.server = (
     "doStuff.py" => (
          "doStuff" => (
          "socket" => "/tmp/fastcgi.python.socket",
          "bin-path" => "/var/www/doStuff.py",
          "check-local" => "disable",
          "max-procs" => 1)
     ),

     "test.py" => (
          "test" => (
          "socket" => "/tmp/test.python.socket",
          "bin-path" => "/var/www/test.py",
          "check-local" => "disable",
          "max-procs" => 1)
     )
)
設定ファイルを書き変えたらlighttpdサーバを再起動します。
$ sudo service lighttpd restart
ここまでで、サーバ側の設定は完了です。
Webブラウザからの制御プログラム
次に実行するPythonファイル(/var/www/doStuff.py)を作成します。
#!/usr/bin/pythonCGI
import RPi.GPIO as GPIO
from flup.server.fcgi import WSGIServer
import sys, urlparse

GPIO.setmode(GPIO.BOARD)
GPIO.setup(11, GPIO.OUT)

def app(environ, start_response):
     start_response("200 OK", [("Content-Type", "text/html")])
     i = urlparse.parse_qs(environ["QUERY_STRING"])
     yield (' ') # flup expects a string to be returned from this function
     if "q" in i:
          if i["q"][0] == "w":
               GPIO.output(11, True) # Turn it on
          elif i["q"][0] == "s":
               GPIO.output(11, False) # Turn it off

WSGIServer(app).run()
ファイルのアクセス権は実行可能とすること。
$ chmod +x doStuff.py
最後に、JavaScriptからPytyonプログラムに要求を送るためのソースをindex2.htmlに埋め込みます。
<html>
<head>
    <title>Hello from the Pi</title>
    <script src="//ajax.googleapis.com/ajax/libs/prototype/1.7.1.0/prototype.js" type="text/javascript">
</script>
</head>

<body>

<h1>Hello world from the Raspberry Pi</h1>


<form>
        <input type="button" value="On" onclick="go('w')" style="font-size:200%;">
        <input type="button" value="Off" onclick="go('s')" style="font-size:200%;">
    </form>

    <script type="text/javascript">
      function go(qry) {
               new Ajax.Request('doStuff.py?q=' + qry,{method: 'GET'} );
          }
    </script>
</body>
</html>
ブラウザでRaspberry Pi([Raspberry PiのIPアドレス]/index2.html)にアクセスすると、以下の画面が表示されます。
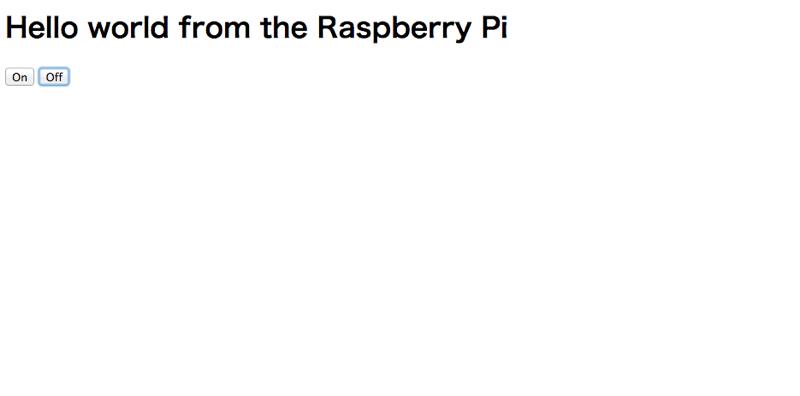
この画面で、[On]を押せばLEDが点灯。[Off]を押せば消灯します。
これで、RaspberryPiにアクセスさえすれば、自宅内のLANにつながったすべてのPC,スマートフォン,タブレットからLEDの点灯を制御できるようになりました。Raspberry PiはLinuxとGPIOを持つことで、簡単にネットワークと、組み込み制御を繋ぐことができるのを実感できます。